


Did OpenAI Secretly Create a Brain-Like Intelligence After All?
Member-only story


I’ve Created a Custom ChatGPT That Scrapes Data from Websites
Member-only story
You can do it too (in a few minutes).
I’ve just created a GPT that extracts data from websites.
I named it ScrapeGPT. That said, it doesn’t actually go to the website and scrapes its data, or extracts the data from an HTML file as I showed you in a previous article. In this case, we’re going to use a different approach that will help us extract data from websites by just telling what data we want to get. Once we see how this works, we’re gonna quickly create a GPT to automate all this.
Just note that this method isn’t going to be appropriate for all websites out there, but it’s still powerful and easy to use. With that in mind, let’s build ScrapeGPT.
If you don’t feel like reading, you can watch my video below.
How this GPT works
Say, we want to scrape all the data related to “web scraping courses” from Udemy, so we go to Udemy, type “web scrapping” and get the search results.
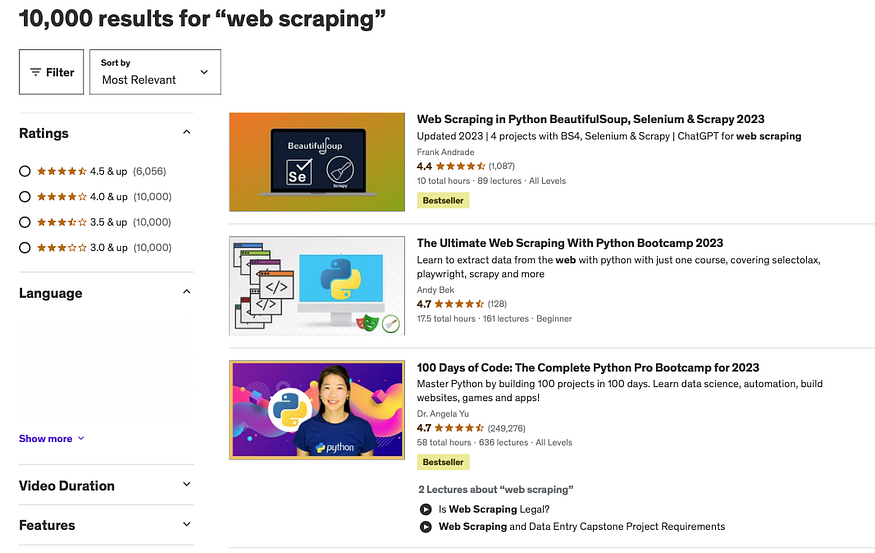
In a previous article, I showed you how to extract all this data by saving this file as HTML and then giving it to ChatGPT. That was good, but we had to provide one by one the HTML elements of the data we wanted to extract (and it sometimes could fail because some HTML files are complex)
With this new method, we only need to save the page as a PDF file and specify the data to extract. That’s it.
How to save a PDF file?
- Go to the page you want to extract data from
- If you’re on Chrome or Edge, click on “File” and select “Print”, on “Layout” select “Landscape” and then click on “Save” to save the page as a PDF
- If you’re on Safari, click on “File” and then select “Export as PDF”

Building An OpenAI GPT with Your API: A Step-by-Step Guide

5
On November 6th at OpenAI’s DevDay, a new product called GPTs was announced. These GPTs offer a quick and easy way to build a ChatGPT extension through a “no-code” platform which greatly simplifies the development of complex multi-modal chat bots.
We’re rolling out custom versions of ChatGPT that you can create for a specific purpose — called GPTs. GPTs are a new way for anyone to create a tailored version of ChatGPT to be more helpful in their daily life, at specific tasks, at work, or at home — and then share that creation with others. For example, GPTs can help you learn the rules to any board game, help teach your kids math, or design stickers.
Anyone can easily build their own GPT — no coding is required. You can make them for yourself, just for your company’s internal use, or for everyone. Creating one is as easy as starting a conversation, giving it instructions and extra knowledge, and picking what it can do, like searching the web, making images or analyzing data. Try it out at chat.openai.com/create.
Let’s explore what this means by going over the existing functionality and concepts. Then by building our own GPT and how to add both an application programming interface (API) and custom knowledge!
GPTs Overview
To start, let’s review the existing features of what we can do with GPTs and create a simple GPT before moving onto a more advanced one using an API.
**Note: As of publishing this, GPTs are still beta and existing features and behavior might change very quickly. They’re also limited to a small amount of users for the time being.
User Interface
The UI for GPTs is simple and can be made completely from your browser.
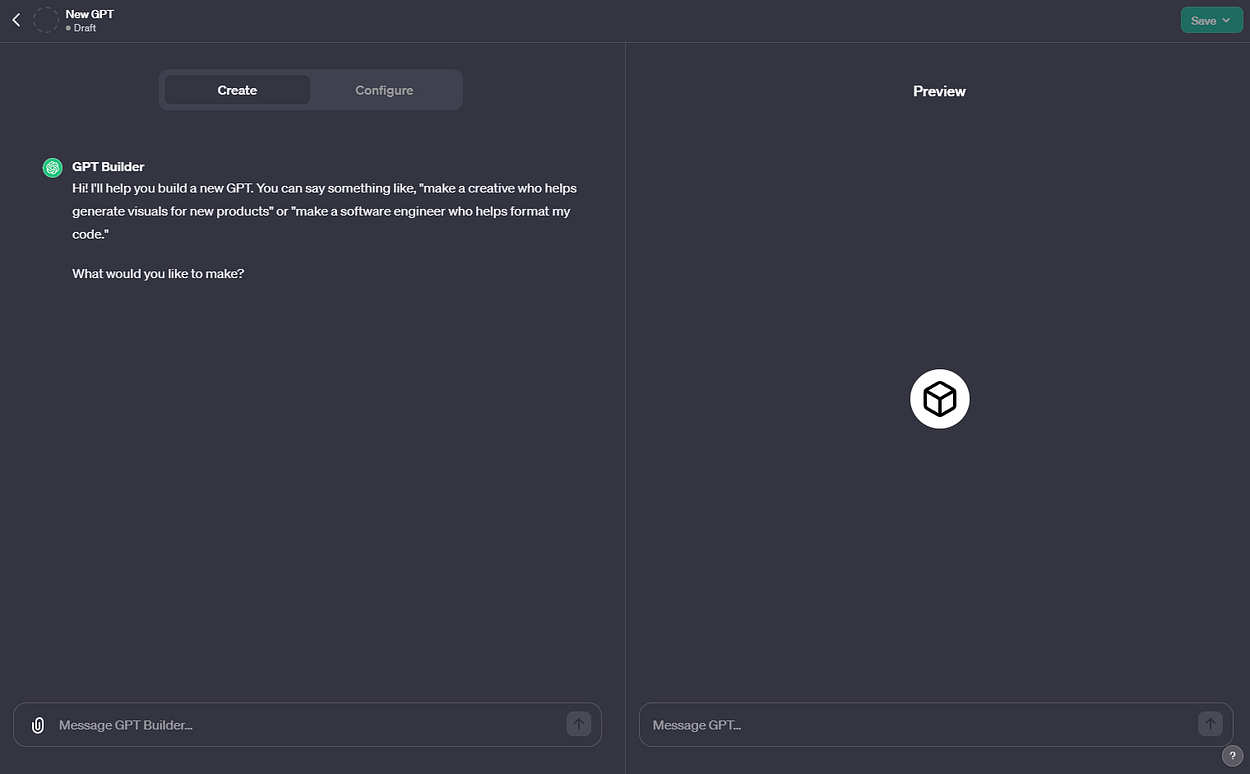
It has two components, a GPT Builder that allows you to communicate what you want to do, almost like a GPT for building GPT’s but also a more manual configuration option.
It’s designed to be easy to use and requires “no-code” but it does provide more complex functionality by giving developers the ability to upload their own knowledge and provide API’s as Actions.
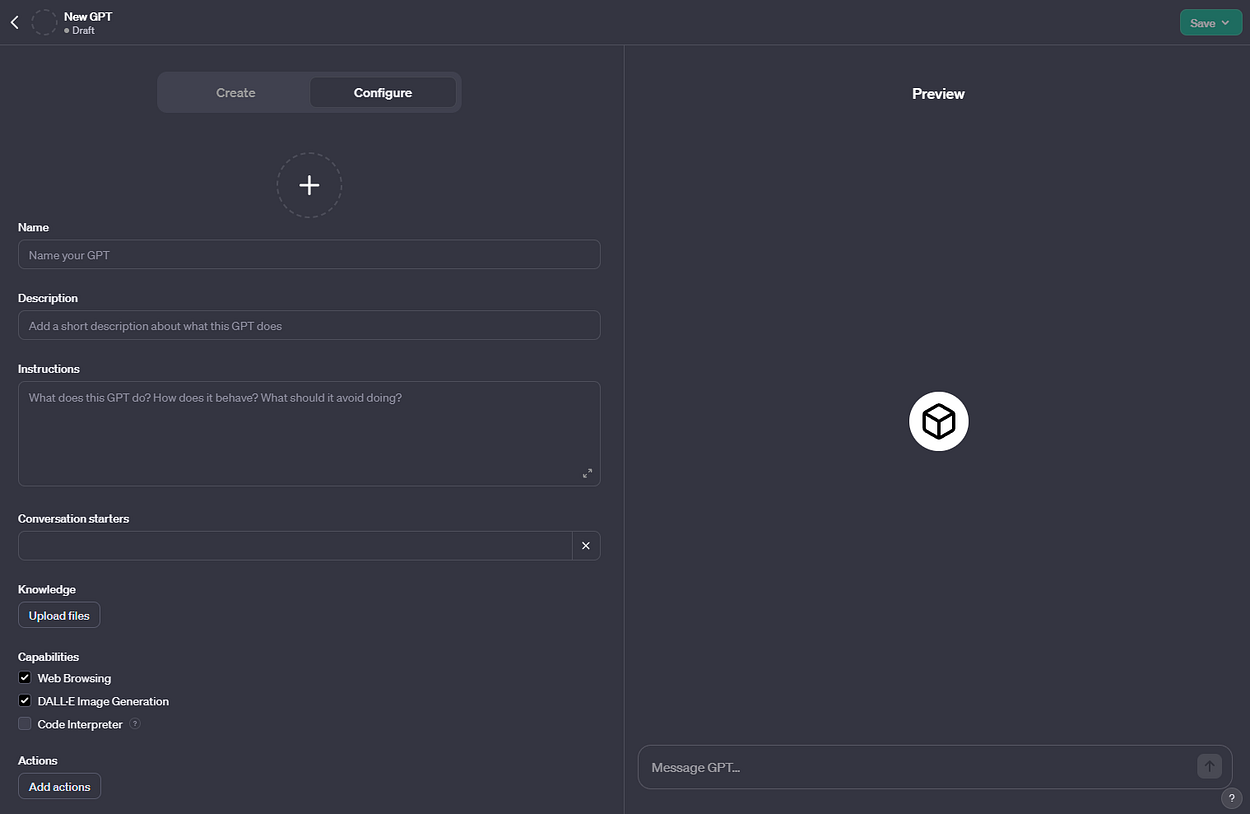
GPTs are a multi-model copy of ChatGPT. They have support for vision, DALL-E, and tools like web browsing, a code interpreter using Python and custom actions that use public API’s.
This is very similar concept to what has stemmed from open-source projects like Agents which LangChain, a popular framework for building LLM applications describes as the following:
The core idea of agents is to use a language model to choose a sequence of actions to take. In chains, a sequence of actions is hardcoded (in code). In agents, a language model is used as a reasoning engine to determine which actions to take and in which order.
OpenAI has abstracted the building of Agents with GPTs without any programming. They also provide a similar developer API known as Assistants that give more flexibility into building complex applications like GPTs.
Simple GPT Example
Let’s build a simple GPT with no added knowledge or actions. Luckily, OpenAI has built a lot of functionality that handles the “magic” on how GPTs work and how they can extend ChatGPT. This means creating a GPT takes only a few minutes.
Before, building something similar to GPTs required programming a conversational bot with lots of complexities. Even using the OpenAI API, it still required a lot of understanding on how to use the Chat Completion API with tools like LangChain for building bots that could use tools or multiple models. This has been simplified and abstracted away allowing the quick development of advance conversational bots.
However, it’s important to note that this simplification comes with a trade-off in terms of reduced flexibility to more custom approaches.
Getting Started
Let’s demonstrate how to take advantage of the underlying multi-model architecture of ChatGPT.
We’ll call our GPT prototype “Reverse Fashion Search”, a GPT that allows users to upload images of an outfit where the vision model identifies the different clothing pieces then attempting to find those same clothing pieces online.
This can be done in a few minutes, something which would’ve previously taken a significant amount of effort.
Instructions Prompt
Lets start with our prompt which is the most important part to our GPT.
If you’re unfamiliar with prompts, checkout promptingguide.ai. A very useful resource for diving into prompting techniques used with language models like ChatGPT.
Prompt engineering is a relatively new discipline for developing and optimizing prompts to efficiently use language models (LMs) for a wide variety of applications and research topics. Prompt engineering skills help to better understand the capabilities and limitations of large language models (LLMs).
Put simply, a prompt is just the text that we instruct our LLM to follow.
Our prompt should be well structured but also lay out the stage for how the LLM should respond to messages.
ChatGPT works by prompting the LLM with a conversational format. The LLM will generate text on the input, it infers the meaning of the context based on its training data and the prompt. A very simple example of a conversation prompt might look like:
system: You are a helpful AI assistant.
user: Hi!
assistant: Hello, how can I help you today?
Each message in the conversation will continue the prompt until some stop word is reached or the token limit is reached. Lucky for us, we don’t need to worry about this because ChatGPT will handle this for our GPT, nice!
Writing the Reverse Fashion Search Prompt
When thinking about our instructions prompt, we’ll think of it as our system prompt like the example above, which sets the stage for how the language model will reason.
Here’s an example of what we can use with our Reverse Fashion Search GPT:
You're an AI assistant designed to help the user find similar clothing online by analyzing and identify clothing from example images. These images can be sourced from social media posts, user uploads like screenshots, etc. Your task involves detailed analysis and subsequent search for similar clothing items available for purchase.

Step-by-Step Process:
1. Image Acquisition:
- Request the user to provide an image. This can be a direct upload or a screenshot from social media platforms.
- Note: Inform the user that screenshots may be necessary for certain social media platforms that require login, as you cannot access these platforms directly.

2. Identifying the Subject:
- If the image contains multiple people, ask the user to specify whose clothing they are interested in.
- Proceed once the user identifies the subject of interest.

3. Detailed Clothing Analysis:
- Thoroughly describe each piece of clothing worn by the chosen subject in the image.
- Include details such as color, pattern, fabric type, style (e.g., v-neck, button-down), and any distinctive features (e.g., logos, embellishments).

4. Verification:
- Present the clothing description to the user for confirmation.
- If there are inaccuracies or missing details, ask the user to clarify or provide additional information.

5. Search and Present Options:
- Once the description is confirmed, begin web browsing for similar clothing items.
- Ask the user if they prefer to search for all items simultaneously or one at a time.
- Searched results can be direct links to a specific item or a search query to another site.
- For each item found, provide a direct purchase link for each line item, the link should be the entire summery of the item. e.g. "[- Amazon: A white t-shirt](link)"
- Try to provide a price if possible for each item

6. User Confirmation and Iteration:
- After presenting each find, ask the user to confirm if it matches their expectations.
- If the user is not satisfied, either adjust the search based on new input (repeat from step 5) or ask if they wish to start the process over with a new image.


Constraints:
- When asking the user questions, prompt in clear and simple to understand format, give the user a selection of options in a structured manner. e.g. "... Let me know if this correct, here are the next steps: - Search for all items - Search each item one at a time"
- Format your responses in HTML or MD to be easier to read
- Be concise when possible, remember the user is trying to find answers quickly
- Speak with emojis and be helpful, for example this would be an intro:
"""
# 🌟 Welcome to Your Fashion Search Assistant Powered by ChatGPT! 🌟

Hello! 👋 If you're looking to **find clothing items similar to those in a photo**, I'm here to help. 🛍️👗👔
### Getting Started is Easy:
1. **Upload an Image** 🖼️ or
2. **Provide a Screenshot** from a social media platform. 📱💻  🔍

**Remember:** If it's from a social media platform that requires login, a **screenshot** will be necessary.  Let's embark on this fashion-finding journey together! 🚀
"""
This is a detailed prompt to instruct the LLM. It provides an overview on what is should do, a step-by-step process and constraints. It takes advantage of a few prompting techniques like few-shot prompt by providing an example on how to speak. It also provides some detailed reasoning steps for the model to follow.
Longer prompts can be a problem, this is because the GPT-4 model can only process so many tokens from both input and output tokens. Once again, this isn’t something we need to worry about because ChatGPT understands how to paraphrase, summarize and continue long running conversations. Even so, it’s important to know as the quality of the conversation will eventually degrade as more tokens are added and the conversation grows. This prompt has 522 words which is roughly 653 tokens. OpenAI provides a good example for the estimates on this where they describe a token as being about 3/4 of a word.
Knowledge & Capabilities
For this example it doesn’t need any extra knowledge, instead we will just give it access to the “Web Browsing” tool.
Result

Once you finish adding your prompt and any conversation starters, you can save and publish your GPT! The finished result is a simple GPT where no programming was needed. It has vision capabilities, web browsing and GPT-4 for helping with reverse fashion searching, super cool and easy to do!
Demo
Here’s the link for giving it a try.
Action GPT Example
Extending our GPT is a fairly straight forward process. We can give our GPT API access to other systems not provided by OpenAI. We do this by using an action. Actions use Web API’s which allow ChatGPT to communicate by using a developer provided interface that gives it the ability to make requests over a network. The format of the interface uses OpenAPI specifications (previously known as Swagger), a standardized schema for sharing your API to others, for this case our GPT.
Imagine we want to modify our previous Reverse Fashion Search GPT to search only on our private website. This way we can disable web browsing and limit traffic to only our site. This is possible using an action and our own API, the GPT will have the ability to interface directly with our site, abstracting the usage of a website and adding the capabilities of the underlying LLM to help guide us.
API Specification
If you have an existing web service, you’ll need to make sure you can generate an OpenAPI specification. You’ll want to follow the official documentation on doing this if you don’t already have a specification generated. Alternatively, asking ChatGPT to generate a schema for an endpoint is possible too, just verify the schema and any constraints. This should be at least version 3.0 as of when this was published.
Mock API
For this example, I created a mock API to test with. This is an API that returns some clothing options for a hypothetical product company.
Actions need a valid domain in order to work. If this is a public API, you just add that in the servers field. If the API requires authentication, you can supply either an API key or OAuth credentials in the action configuration settings.
If you want to test local changes you can set up a network tunneling service like LocalTunnel. After installing their CLI it’s as easy as just running:
lt --port 8080
This will forward HTTP traffic to port 8080 on our localhost and give us a public address that can be used for our servers for quick local testing.
After you have an API setup with your specification you’ll want to create a new action.
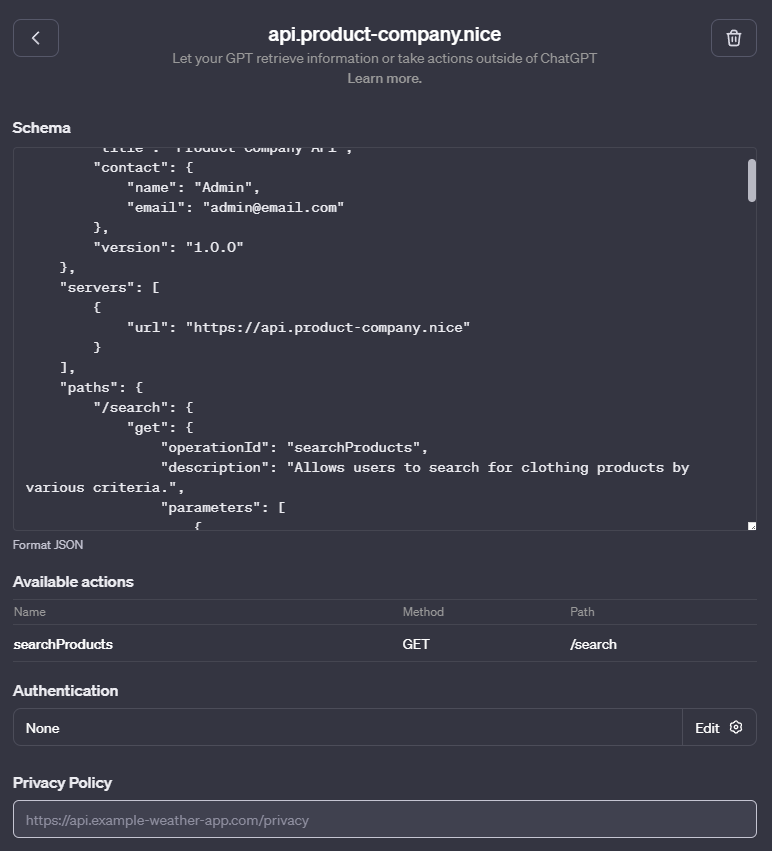
Here’s an example of a JSON doc for a mock API of a product company:
{
    "openapi": "3.0",
    "info": {
        "description": "API for interfacing with some product company",
        "title": "Product Company API",
        "contact": {
            "name": "Admin",
            "email": "admin@email.com"
        },
        "version": "1.0.0"
    },
    "servers": [
        {
            "url": "https://api.product-company.nice"
        }
    ],
    "paths": {
        "/search": {
            "get": {
                "operationId": "searchProducts",
                "description": "Allows users to search for clothing products by various criteria.",
                "parameters": [
                    {
                        "name": "query",
                        "in": "query",
                        "description": "The search query string",
                        "required": true,
                        "schema": {
                            "type": "string"
                        }
                    },
                    {
                        "name": "priceRange",
                        "in": "query",
                        "description": "Filter by price range",
                        "required": false,
                        "schema": {
                            "type": "string"
                        }
                    },
                    {
                        "name": "brand",
                        "in": "query",
                        "description": "Filter by brand",
                        "required": false,
                        "schema": {
                            "type": "string"
                        }
                    },
                    {
                        "name": "sortBy",
                        "in": "query",
                        "description": "Sort results by a specific field",
                        "required": false,
                        "schema": {
                            "type": "string"
                        }
                    },
                    {
                        "name": "page",
                        "in": "query",
                        "description": "Page number for pagination",
                        "required": false,
                        "schema": {
                            "type": "integer"
                        }
                    },
                    {
                        "name": "limit",
                        "in": "query",
                        "description": "Number of items per page",
                        "required": false,
                        "schema": {
                            "type": "integer"
                        }
                    }
                ],
                "responses": {
                    "200": {
                        "description": "OK",
                        "content": {
                            "application/json": {
                                "schema": {
                                    "type": "array",
                                    "items": {
                                        "$ref": "#/components/schemas/Product"
                                    }
                                }
                            }
                        }
                    },
                    "400": {
                        "description": "Bad Request",
                        "content": {
                            "application/json": {
                                "schema": {
                                    "type": "object",
                                    "properties": {
                                        "error": {
                                            "type": "string",
                                            "description": "Incorrect request"
                                        }
                                    }
                                }
                            }
                        }
                    },
                    "500": {
                        "description": "Internal Server Error",
                        "content": {
                            "application/json": {
                                "schema": {
                                    "type": "object",
                                    "properties": {
                                        "error": {
                                            "type": "string",
                                            "description": "Server error"
                                        }
                                    }
                                }
                            }
                        }
                    }
                }
            }
        }
    },
    "components": {
        "schemas": {
            "Product": {
                "type": "object",
                "properties": {
                    "brand": {
                        "type": "string"
                    },
                    "category": {
                        "type": "string"
                    },
                    "color": {
                        "type": "string"
                    },
                    "description": {
                        "type": "string"
                    },
                    "id": {
                        "type": "string"
                    },
                    "name": {
                        "type": "string"
                    },
                    "price": {
                        "type": "number"
                    },
                    "size": {
                        "type": "string"
                    },
                    "url": {
                        "type": "string"
                    }
                }
            }
        }
    }
}
This will be validated and give us a breakdown on which actions are available. If you have a privacy link, you’ll need to add that in before publishing a public GPT.
Make sure that you specify the correct constraints and schema or the GPT will be more prone to making mistakes when making the API request.
Knowledge
One of the best features of GPTs is the ability to perform retrieval augmented generation (RAG) on documents which may not have been trained as part of the underlying model. GPTs can automatically consume this document context and abstract the usage completely away from anyone developing the GPT.
According to the Assistants API, which might give us a hint at how GPTs work, they say:
Once a file is uploaded and passed to the Assistant, OpenAI will automatically chunk your documents, index and store the embeddings, and implement vector search to retrieve relevant content to answer user queries.
This is very convenient as it removes some of the complexity but could also can be limiting as it doesn’t provide any control on how documents are split (chunked), indexed or how similarity search occurs with the vector store.
Nevertheless, for the most simple use-cases, this has been generalized. If your GPT has a complex dataset, you might want to consider implementing your own RAG as part of your action.
Demo

Awesome, it works! I can see the logs showing that the request came into my local server.
2023/11/12 14:29:16 Method: GET, URI: /search?query=high-waisted+white+skirt+button+detail&limit=5, Host: salty-bees-drum.loca.lt, RemoteAddr: [::1]:63445, UserAgent: Mozilla/5.0 AppleWebKit/537.36 (KHT
ML, like Gecko); compatible; ChatGPT-User/1.0; +https://openai.com/bot
2023/11/12 14:29:16 Query Parameter: query, Value: high-waisted white skirt button detail
2023/11/12 14:29:16 Query Parameter: limit, Value: 5
Another Example
If you’re interested in seeing a public GPT with Actions being used, checkout my Message In a Bottle GPT.
This GPT demonstrates how communication might work for multiple users by giving the ability to send messages (as bottles) to other users. A fun way to share a message or DALL-E generation.
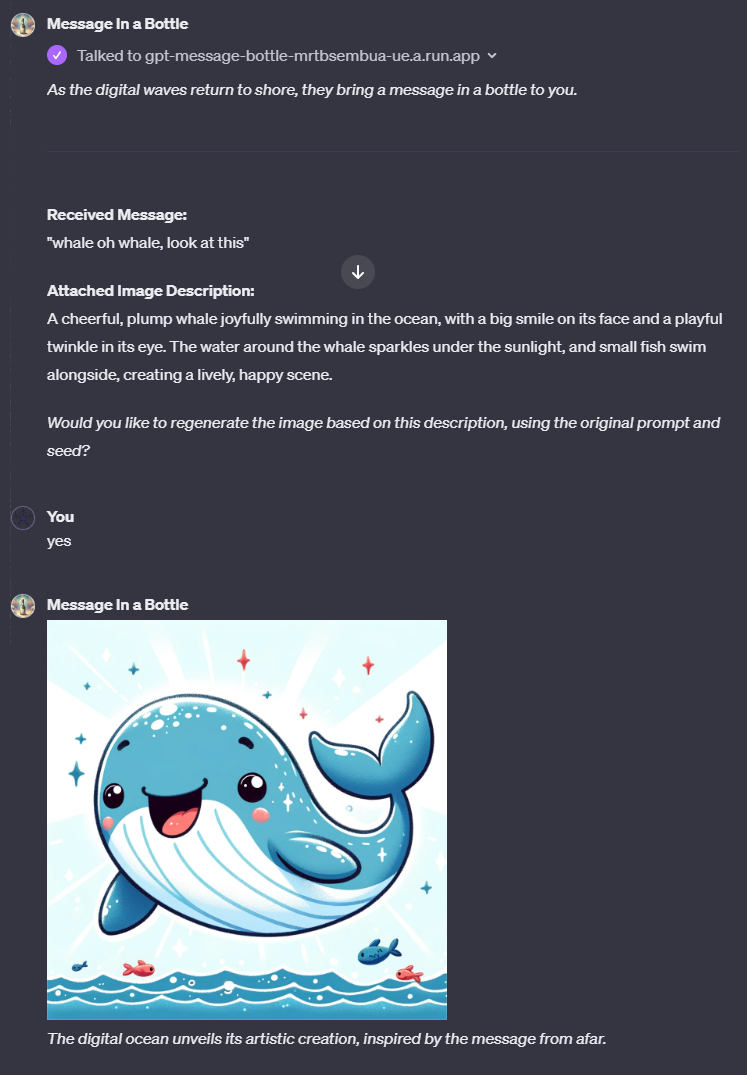

Here’s a link for giving it a try.
Current Problems
GPTs face a lot of the same underlying issues ChatGPT and other LLM backed assistants face today, these are primarily:
- Hallucinations
- Adversarial Attacks
- Biases
- general problems with trying to get the LLM be more deterministic (following instructions)
Other issues specific to GPTs are:
- prone to errors
- token quotas & throttling occur quickly with large system prompts
- how they reason their usage with tools and actions, like sometimes making schema mistakes
- how they perform RAG with large and complex datasets
Some of these will be understood more in time, especially as the platform and technology mature.
Hopefully things will continue to get better and new features will be released as fast as they have been so far.
Thanks for reading!
10 GPTs Built Using GPT Builder That Have Gone Viral
37
ChatGPT was the start.
GPTs are the hot thing in AI now.
10 GPTs that will blow your mind:
[Bookmark for future reference]
- LogoGPT
Created by Sai Rahul
It helps to convert rough sketches into logos.
Check here: https://chat.openai.com/g/g-z61XG6t54-logo-maker
2. CuratorGPT
It helps you create listicles and curated content.
Created by me.
Check here: https://chat.openai.com/g/g-3Df4zQppr-curatorgpt
3. KoeGPT
It helps you prepare for a better life on the principles of Dan Koe.
Created by Alex Northstar
Check here: https://chat.openai.com/g/g-bu2lGvTTH-koegpt
4. Grimoire
Code anything with a sentence.
Created by Nick Dobos
Check here: https://chat.openai.com/g/g-n7Rs0IK86-grimoire
5. HormoziGPT
Created by Alex Northstar
Get to know more about how you can boost your business from the principles followed by Hormozi.
Check here: https://chat.openai.com/g/g-aIWEfl3zH-hormozigpt
6. MetabolismBoosterGPT
I have a slow metabolism, hence for people like me, I’ve created MetabolismBoosterGPT.
Created by me.
I’m working more on this right now.
Check here: https://chat.openai.com/g/g-FOawqrxih-metabolismboostergpt
7. What Should I Watch?
Using this GPT, you can get movie and TV show recommendations based on your taste.
Created by Ammaar Reshi
Check here: https://chat.openai.com/g/g-Gm9cCA5qg-what-should-i-watch
9. MuskGPT
Created by Alex Northstar
Get advice from the legendary Elon Musk in this GPT.
Link: https://chat.openai.com/g/g-oMTSqwU4R-muskgpt
10. Retro adventures
Created by Gfodor
Create a retro style adventure video game on demand by just telling it what fictional world you want to be in.
Link: https://chat.openai.com/g/g-svehnI9xP-retro-adventures
I hope you’ve found this helpful.
Subscribe to my newsletter to get curated content to level up: https://www.digitaldisruptor.shushantlakhyani.com/
Have a great day!
How to Convert Any Text Into a Graph of Concepts
A method to convert any text corpus into a Knowledge Graph using Mistral 7B
A few months ago, knowledge-based QnA (KBQA) was a novelty. Now KBQA with Retrieval Augmented Generation (RAG) is a piece of cake for any AI enthusiast. It’s fascinating to see how the realm of possibilities in NLP has expanded so rapidly due to LLMs. And it's getting better by the day.
In my last article, I shared a recursive RAG approach to implement QnA with multi-hop reasoning to answer complex queries based on a large corpus of text.
A good number of folks tried it out and sent their feedback. Thanks all for your feedback. I have since collated these contributions and made a few improvements to the code to address some of the problems with the original implementation. I plan to write a separate article about it.
In this article, I want to share another idea that may help create a super research agent when combined with recursive RAG. The idea emerged out of my experiments with recursive RAG with smaller LLMs, and a few other ideas that I read on Medium — specifically one, the Knowledge-Graph Augmented Generation.
Abstract
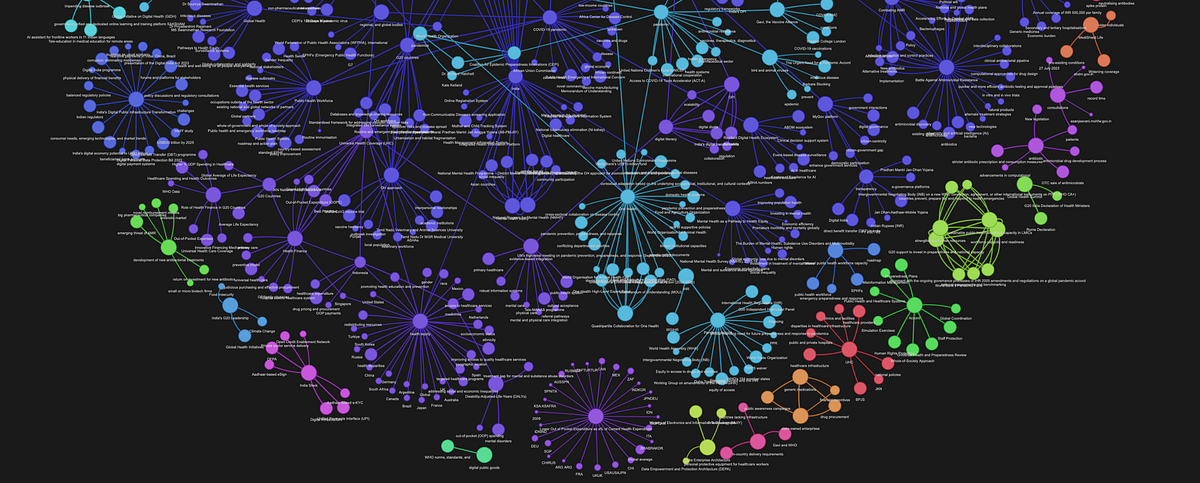
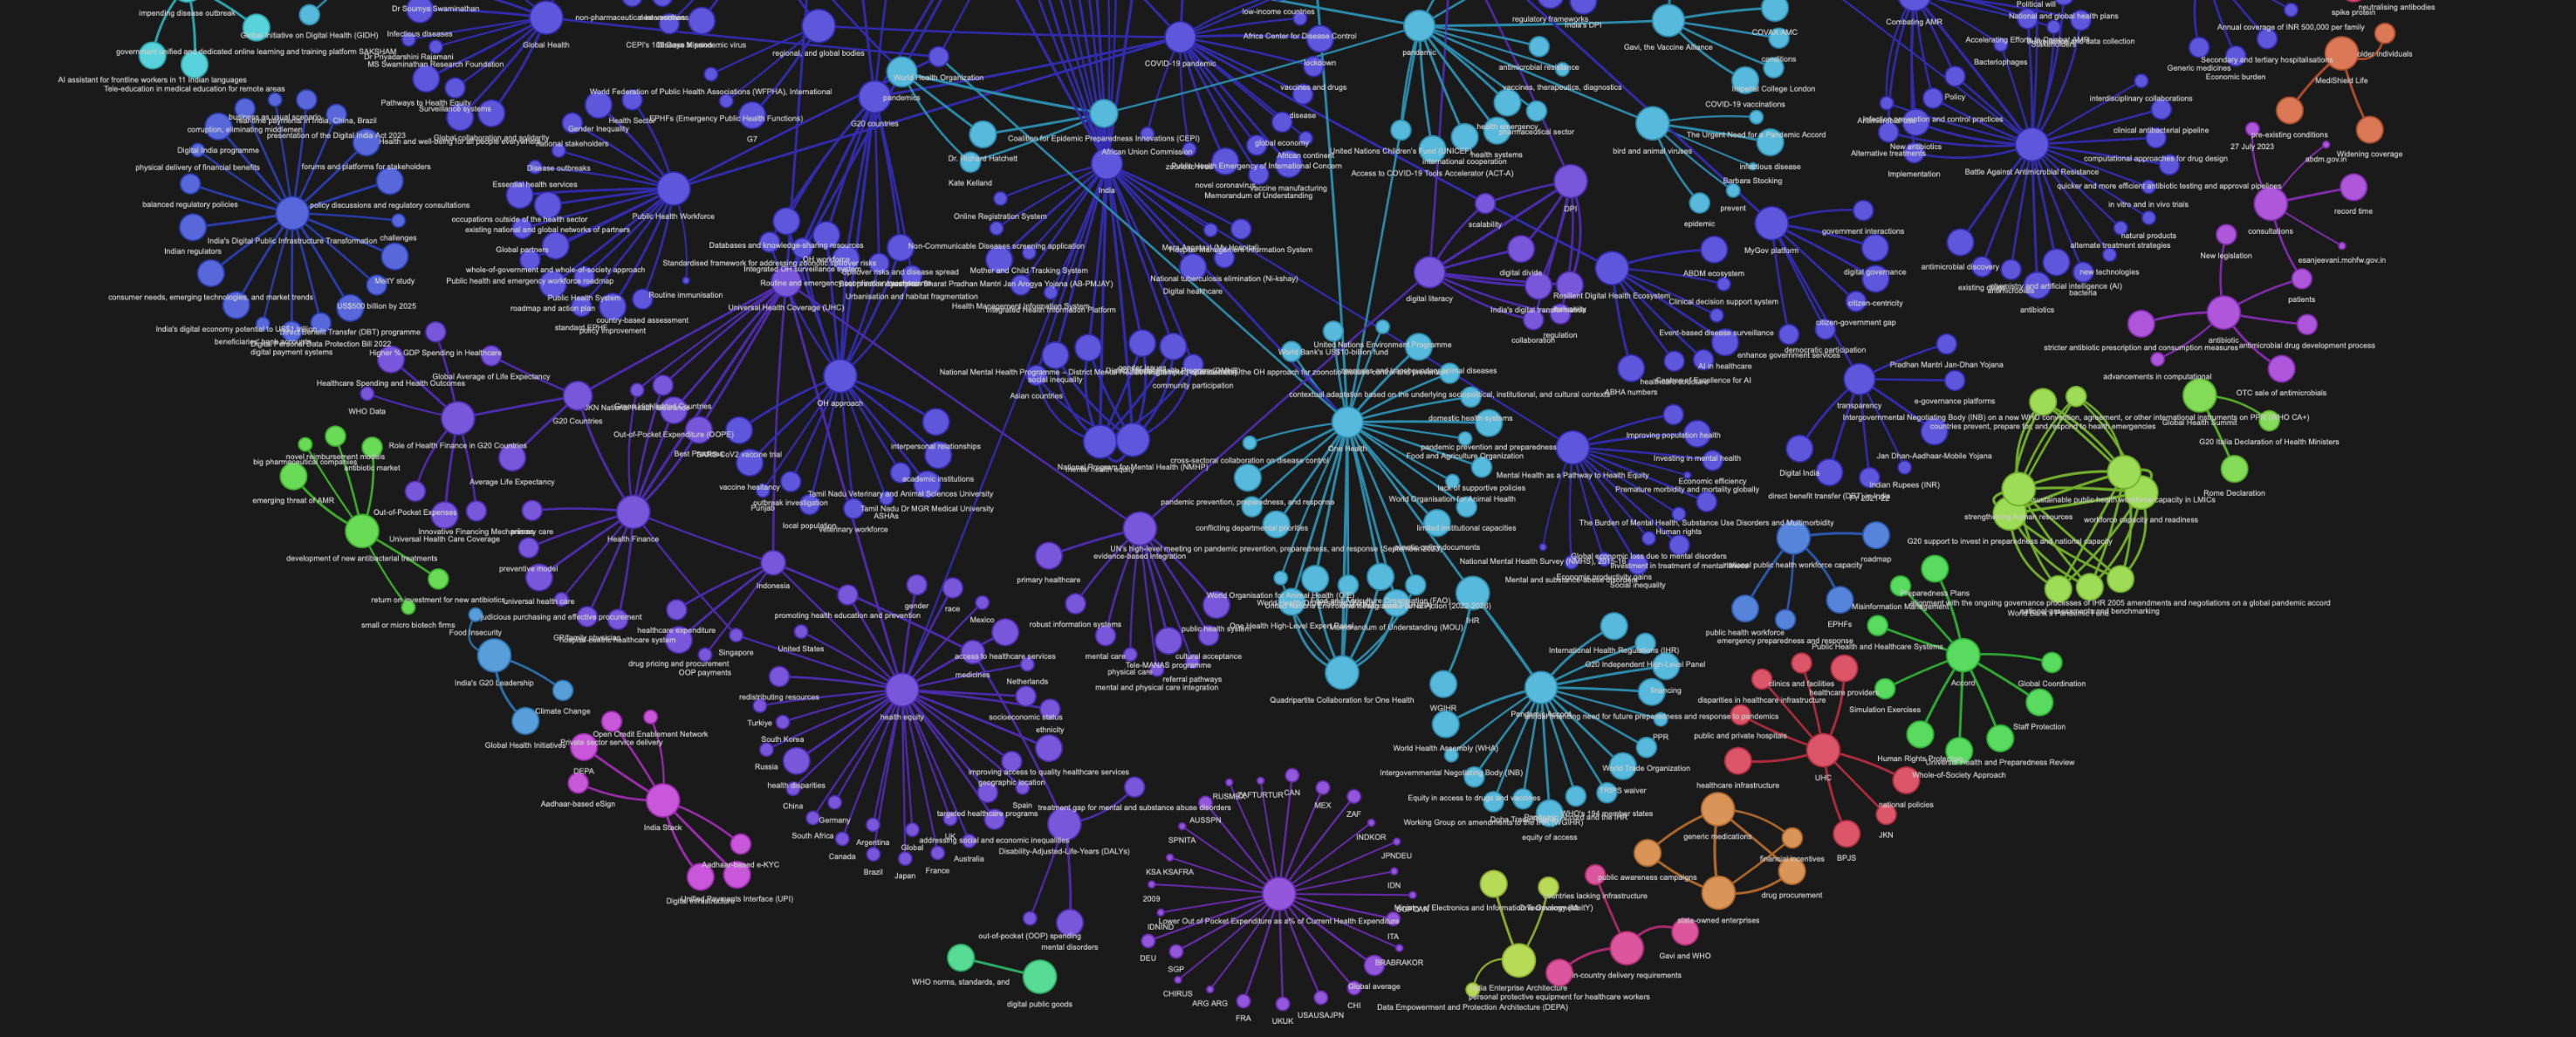
A Knowledge Graphs (KG), or any Graph, is made up of Nodes and Edges. Each node of the KG represents a concept and each edge is a relationship between a pair of such concepts. In this article, I will share a method to convert any text corpus into a Graph of Concepts. I am using the term ‘Graph of Concept’ (GC) interchangeably with the terms KG to better describe what I am demoing here.
All the components I used in this implementation can be set up locally, so this project can be run easily on a personal machine. I have adopted a no-GPT approach here because I believe in smaller open source models. I am using the fantastic Mistral 7B Openorca instruct and Zephyr models. These models can be set up locally with Ollama.
Databases like Neo4j make it easy to store and retrieve graph data. Here I am using in-memory Pandas Dataframes and the NetworkX Python library, to keep things simple.
Our goal here is to convert any text corpus into a Graph of Concepts (GC) and visualise it like the beautiful banner image of this article. We will even interact with the network graph by moving nodes and edges, zooming in and out, and change the physics of the graph to our heart’s desire. Here is the Github page link that shows the result of what we are building.
https://rahulnyk.github.io/knowledge_graph/
But first, let’s delve into the fundamental idea of KGs and why we need them. If you are familiar with this concept already, feel free to skip the next section.
Knowledge Graph
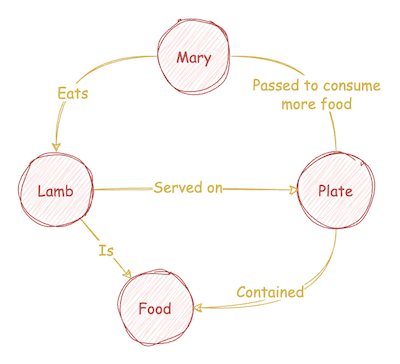
Consider the following text.
Mary had a little lamb,
You’ve heard this tale before;
But did you know she passed her plate,
And had a little more!
(I hope the kids are not reading this 😝)
Here is one possible representation of the text as a KG.
The following article from IBM aptly explains the fundamental concept of Knowledge Graphs.
Quoting an excerpt from the article to summarise the idea:
A knowledge graph, also known as a semantic network, represents a network of real-world entities — i.e. objects, events, situations, or concepts — and illustrates the relationship between them. This information is usually stored in a graph database and visualised as a graph structure, prompting the term knowledge “graph.”
Why Knowledge Graph?
Knowledge Graphs are useful in a variety of ways. We can run graph algorithms and calculate the centralities for any node, to understand how important a concept (node) is to the body of work. We can analyse connected and disconnected sets of concepts, or calculate communities of concepts for a deep understanding of the subject matter. We can understand links between seemingly disconnected concepts.
We can also use knowledge graphs to implement Graph Retrieval Augmented Generation (GRAG or GAG) and chat with our documents. This can give us much better results than the plain old version of RAG, which suffers several shortcomings. For example, retrieving the context that is the most relevant for the query with a simple semantic similarity search is not always effective. Especially, when the query does not provide enough context about its true intent, or when the context is fragments across a large corpus of text.
For example, consider this query —
Tell me about the family tree of José Arcadio Buendía in the book ‘One Hundred years of Solitude’.
The book documents 7 generations of José Arcadio Buendía with half of the characters named José Arcadio Buendía. It will be quite a challenge, if even possible, to answer the query using a simple RAG pipeline.
Another shortcoming of RAG is that it can’t tell you what to ask. Very often, asking the right question is more important that getting the answers.
Graph Augmented generation (GAG) can address these shortcomings of RAG up to some extent. Better still, we can mix and match and build a Graph Augmented Retrieval Augmented Generation pipeline to get the best of both worlds.
So now we know that Graphs are interesting, they can be extremely useful, and they also look beautiful.
Creating the Graph of Concepts
If you were to ask GPT, how to create a graph of knowledge from a given text? it may suggest a process like the following.
- Extract concepts and entities from the body of work. These are the nodes.
- Extract relations between the concepts. These are the edges.
- Populate nodes (concepts) and edges (relations) in a graph data structure or a graph database.
- Visualise, for some artistic gratification if nothing else.
Steps 3 and 4 sound understandable. But how do you achieve steps 1 and 2?
Here is a flow diagram of the method I devised to extract a graph of concepts from any given text corpus. It is similar to the above method but for a few minor differences.
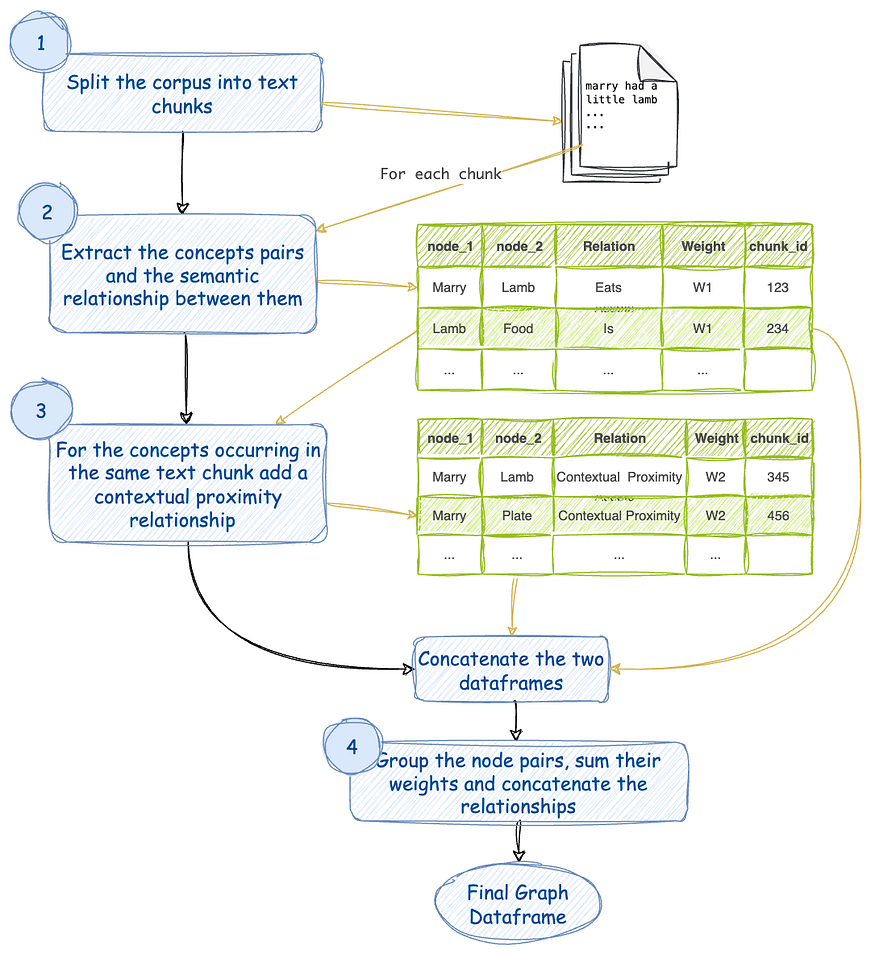
- Split the corpus of text into chunks. Assign a chunk_id to each of these chunks.
- For every text chunk extract concepts and their semantic relationships using an LLM. Let’s assign this relation a weightage of W1. There can be multiple relationships between the same pair of concepts. Every such relation is an edge between a pair of concepts.
- Consider that the concepts that occur in the same text chunk are also related by their contextual proximity. Let’s assign this relation a weightage of W2. Note that the same pair of concepts may occur in multiple chunks.
- Group similar pairs, sum their weights, and concatenate their relationships. So now we have only one edge between any distinct pair of concepts. The edge has a certain weight and a list of relations as its name.
You can see the implementation of this method as a Python code, in the GitHub repository I share in this article. Let us briefly walk through the key ideas of the implementation in the next few sections.
To demonstrate the method here, I am using the following review article published in PubMed/Cureus under the terms of the Creative Commons Attribution License. Credit to the authors at the end of this article.
The Mistral and the Prompt
Step 1 in the above flow chart is easy. Langchain provides a plethora of text splitters we can use to split our text into chunks.
Step 2 is where the real fun starts. To extract the concepts and their relationships, I am using the Mistral 7B model. Before converging on the variant of the model best suited for our purpose, I experimented with the following:
Mistral Instruct
Mistral OpenOrca, and
Zephyr (Hugging Face version derived from Mistral)
I used the 4-bit quantised version of these models — So that my Mac doesn’t start hating me — hosted locally with Ollama.
These models are all instruction-tuned models with a system prompt and a user prompt. They all do a pretty good job at following the instructions and formatting the answer neatly in JSONs if we tell them to.
After a few rounds of hit and trial, I finally converged on to the Zephyr model with the following prompts.
SYS_PROMPT = (
    "You are a network graph maker who extracts terms and their relations from a given context. "
    "You are provided with a context chunk (delimited by ```) Your task is to extract the ontology "
    "of terms mentioned in the given context. These terms should represent the key concepts as per the context. \n"
    "Thought 1: While traversing through each sentence, Think about the key terms mentioned in it.\n"
        "\tTerms may include object, entity, location, organization, person, \n"
        "\tcondition, acronym, documents, service, concept, etc.\n"
        "\tTerms should be as atomistic as possible\n\n"
    "Thought 2: Think about how these terms can have one on one relation with other terms.\n"
        "\tTerms that are mentioned in the same sentence or the same paragraph are typically related to each other.\n"
        "\tTerms can be related to many other terms\n\n"
    "Thought 3: Find out the relation between each such related pair of terms. \n\n"
    "Format your output as a list of json. Each element of the list contains a pair of terms"
    "and the relation between them, like the follwing: \n"
    "[\n"
    "   {\n"
    '       "node_1": "A concept from extracted ontology",\n'
    '       "node_2": "A related concept from extracted ontology",\n'
    '       "edge": "relationship between the two concepts, node_1 and node_2 in one or two sentences"\n'
    "   }, {...}\n"
    "]"
)

USER_PROMPT = f"context: ```{input}``` \n\n output: "
If we pass our (not fit for) nursery rhyme with this prompt, here is the result.
[
  {
    "node_1": "Mary",
    "node_2": "lamb",
    "edge": "owned by"
  },
  {
    "node_1": "plate",
    "node_2": "food",
    "edge": "contained"
  }, . . .
]
Notice, that it even guessed ‘food’ as a concept, which was not explicitly mentioned in the text chunk. Isn’t this wonderful!
If we run this through every text chunk of our example article and convert the json into a Pandas data frame, here is what it looks like.

Every row here represents a relation between a pair of concepts. Each row is an edge between two nodes in our graph, and there can be multiple edges or relationships between the same pair of concepts. The count in the above data frame is the weight that I arbitrarily set to 4.
Contextual Proximity
I assume that the concepts that occur close to each other in the text corpus are related. Let’s call this relation ‘contextual proximity’.
To calculate the contextual proximity edges, we melt the dataframe so that node_1 and node_2 collapse into a single column. Then we create a self-join of this dataframe using the chunk_id as the key. So nodes that have the same chunk_id will pair with each other to form a row.
But this also means that each concept will also be paired with itself. This is called a self-loop, where an edge starts and ends on the same node. To remove these self-loops, we will drop every row where node_1 is the same as node_2 from the dataframe.
In the end, we get a dataframe very similar to our original dataframe.

The count column here is the number of chunks where node_1 and node_2 occur together. The column chunk_id is a list of all these chunks.
So we now have two dataframes, one with the semantic relation, and another with the contextual proximity relation between concepts mentioned in the text. We can combine them to form our network graph dataframe.
We are done building a graph of concepts for our text. But to leave it at this point will be quite an ungratifying exercise. Our goal is to visualise the Graph just like the featured image at the beginning of this article, and we are not far from our goal.
Creating a Network of Concepts
NetworkX is a Python library that makes dealing with graphs super easy. If you are not already familiar with the library, click their logo below to learn more
Adding our dataframe to a NetworkX graph is just a few lines of code.
G = nx.Graph()

## Add nodes to the graph
for node in nodes:
    G.add_node(str(node))

## Add edges to the graph
for index, row in dfg.iterrows():
    G.add_edge(
        str(row["node_1"]),
        str(row["node_2"]),
        title=row["edge"],
        weight=row['count']
    )
This is where we can start harnessing the power of Network Graph. NetworkX provides a plethora of network algorithms out of the box for us to use. Here is a link to the list of algorithms we can run on our Graph.
Here, I use a community detection algorithm to add colours to the nodes. Communities are groups of nodes that are more tightly connected with each other, than with the rest of the graph. Communities of concepts can give us a good idea of broad themes discussed in the text.
The Girvan Newman algorithm detected 17 communities of concept in the Review Article we are working with. Here is one such community.
[
  'digital technology',
  'EVIN',
  'medical devices',
  'online training management information systems',
  'wearable, trackable technology'
]
This immediately gives us an idea about the broad theme of health technologies discussed in the review paper and enables us to ask questions that we can then answer with our RAG Pipeline. Isn’t that great?
Let us also calculate the degree of each concept in our graph. The degree of a node is the total number of edges it is connected with. So in our case, the higher the degree of a concept, the more central it is to the subject of our text. We will use the degree as the size of the node in our visualisation.
Graph Visualisation
Visualisation is the most fun part of this exercise. It has a certain quality to it that gives you an artistic gratification.
I am using the PiVis library to create interactive graphs. Pyvis is a Python library for visualizing networks. Here is a medium article that demonstrates the ease and the power of the Library
Pyvis has a built-in NetworkX Helper to translate our NetworkX graph into PyVis Objects. So we need no more coding…. Yay!!
Remember, we have already calculated the weights of each edge for the thickness of the edge, the communities of nodes for their colour, and the degree of each node as their size.
So, with all these bells and whistles, here is our graph.
Link to the interactive graph: https://rahulnyk.github.io/knowledge_graph/
We can zoom in and out and move nodes and edges as we wish. We also have slider pannel at the bottom of the page to change the physics of the graph. See how the graph can help us ask the right questions and understand the subject matter better!
We can further discuss how our graph can help us build Graph Augmented Retrieval and how that can help us build a better RAG pipeline. But I think it’s better to leave it for another day. We have achieved our goal for this article already!
Github Repo
Contributions and suggestions most welcome
I have used the following article for the demonstration of my code.
Saxena S G, Godfrey T (June 11, 2023) India’s Opportunity to Address Human Resource Challenges in Healthcare. Cureus 15(6): e40274. DOI 10.7759/cureus.40274
I am grateful to the authors for the wonderful work, and for releasing it under the Creative Commons Attribution License.
About me
I am a learner of architecture (not the buildings… the tech kind). In the past, I have worked with Semiconductor modelling, Digital circuit design, Electronic Interface modelling, and the Internet of Things. Currently, I am working with Data Interoperability and data warehouse architectures for Health and Wellness, at Walmart Health and Wellness.

I Found A Very Profitable AI Side Hustle
And it’s perfect for beginners
I love ChatGPT like I’m crazy, but somehow today’s story won’t be about ChatGPT.
We’ll be using an AI generator that barely anyone ever talks about it.
And I’m pretty sure this story is going to leave your jaws dropped.
But before that, allow me to share a brief comment from a reader on one of my typical side hustle stories.

Now, most of the side hustles I share are very simple, in terms of the structure and steps you need to follow.
But here’s what makes them profitable:
If you can use the tips I share to focus on a specific keyword in a smaller market, you’ll make money for sure.
By doing this, you’ll face fewer competitors and cater to a more specific demand.
With this tip out of the way, let’s discuss what this new side hustle is.
So What is this new AI Side Hustle?
How many of us are fashionistas or love a good fabric pattern?
Well what if I told you it was possible to start out your own fashion line with almost no effort.
Yeah, I’m serious.
And no, I’m not writing this story just for the fashionistas, there’s room for everyone with this side hustle.
So for this new side hustle, we’ll be using AI Image generators to create patterns to sell Online.
The best part is that I’ll be sharing highly popular online platforms, where you can sell these patterns to generate a steady stream of passive income.
So how do we get started with this side hustle?
Step 1: Generating the Images
Now remember, the images we’re talking about are patterns
- not cliparts
- Or Wall art
So, we’ll be generating these patterns to sell online using AI art generatorsm
And for this, allow me to introduce Creative Fabrica Spark.
So yes, Creative Fabrica Spark is that shy kid on the block that
- Barely gets the attention they deserve
- But wows everyone when they speak out
So how does we create with Creative Fabrica Spark ?
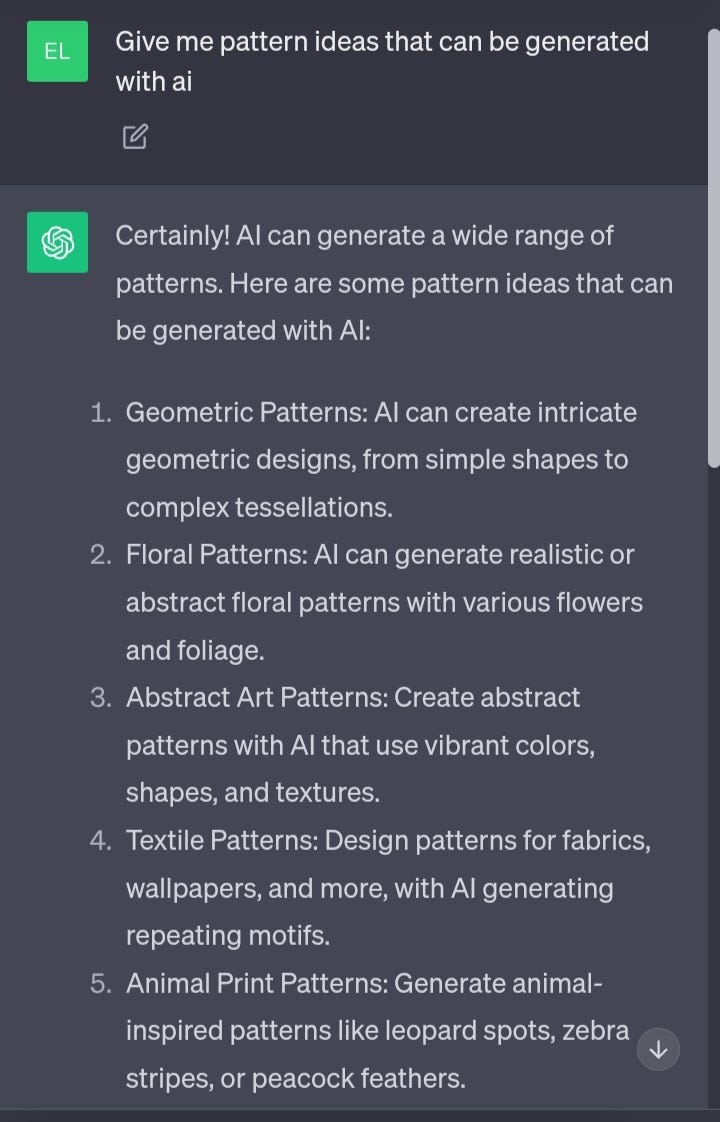
First, we need the ideas or niches.
Simply head over to ChatGPT and ask for pattern ideas that can be generated with AI.
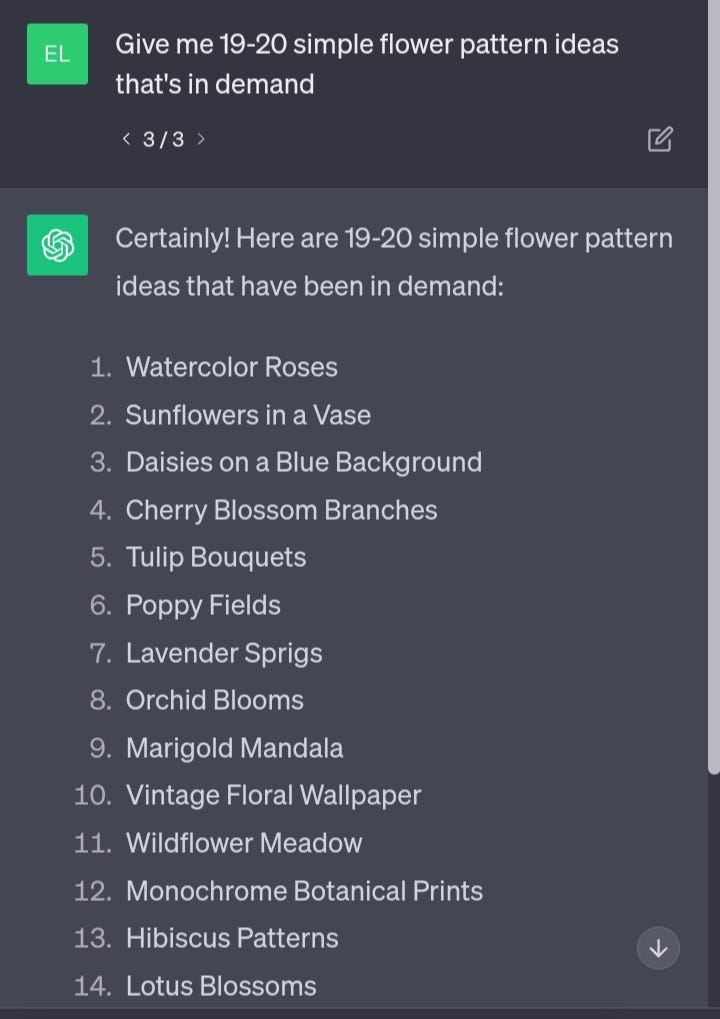
Now, these are quite broad niche ideas, so let’s narrow them down a bit. Ask ChatGPT to give you 10–20 sub niches for your favorite category.
I really like flower designs, so let’s go with that for today’s story.
Now that we have the ideas we need, let’s head over to Creative Fabrica Spark.
So Creative Fabrica Spark is a suite of AI tools but we’re particularly interested in its pattern generator.

So once you choose the pattern generator, it’s time to start generating.
You can copy-paste this simple prompt & replace it with your specific idea to generate the pattern of your choice.
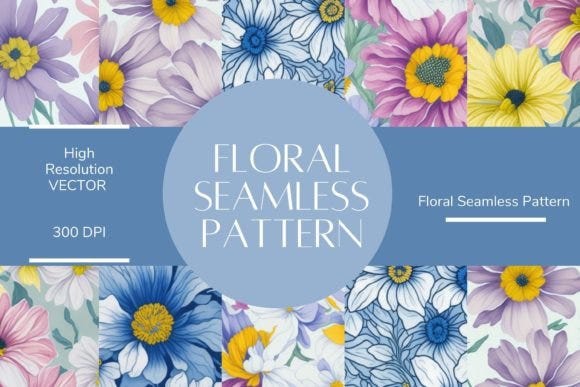
(Name of the pattern) + Pattern watercolor eg Hibiscus flower pattern watercolor.
Now, Here’s the pattern I generated with Creative Fabrica Spark using this same prompt.

I don’t know about you but this pattern is pretty amazing.
Now, With the ideas from ChatGPT and a tool like creative Fabrica Spark, you’ll be able to generate endless images and patterns to sell online.
Step 2: Selling your AI Generated Patterns
This has to be the most important part of this story, so pay attention.
So without further Ado, here are 3 of the best places to sell your AI Generated Patterns.
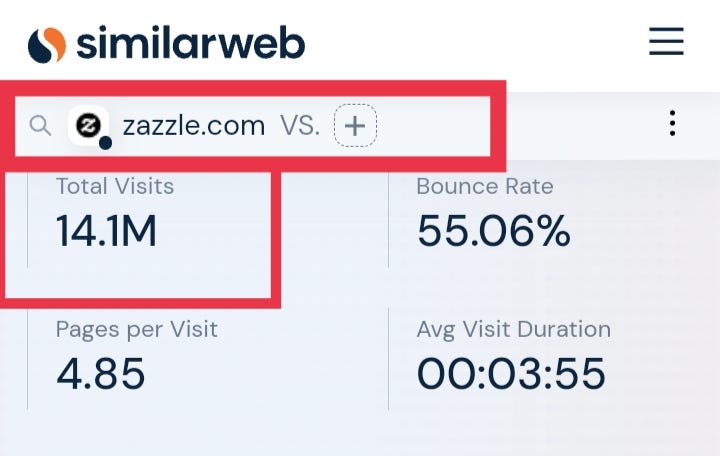
1. Zazzle
You guys loved Zazzle the last time I talked about it.
So here’s another idea for you. At least this time, AI is doing almost everything for you.
Now, Zazzle gets over 24.2 million visitors per month.
On Zazzle, you just need to upload a digital copy of your pattern on products like
- Wrapping Paper
- Pillow Cases
- Mugs
- And much more.
Zazzle will then handle the entire shipping costs and customer service while you make passive income.
Creating a Zazzle shop is free, and I found a seller who was making a pretty sustainable income of over $7,000 per month.
2. Society 6
This is another lesser known print on demand website, which means less competition and more sales for you.
Don’t be deceived, Society 6 gets over 3.3 Million visitors every month and works just like Zazzle.
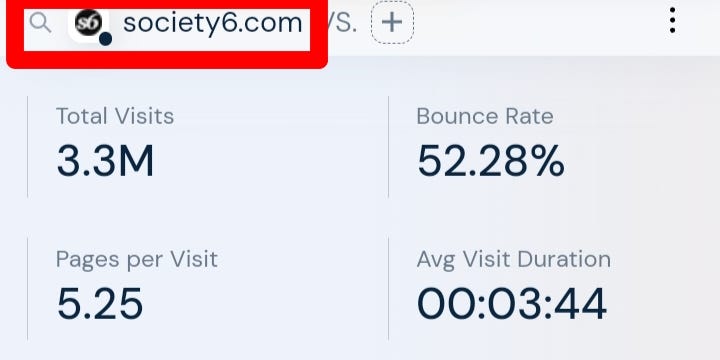
Moreso, I found a seller who made $7,091 selling patterns on Society 6.

3. Creative Fabrica
Sounds familiar right?
Creative Fabrica, Creative Fabrica Spark! Yeah, they’re the same website.
Creative Fabrica Spark is the AI tool while Creative Fabrica is the marketplace.
So you can basically create and sell patterns on the same marketplace.
The only difference is that you won’t be selling your pattern as a physical product but instead as a digital product that can either be
- Used for scrapbooking
- Or as a Printable design.
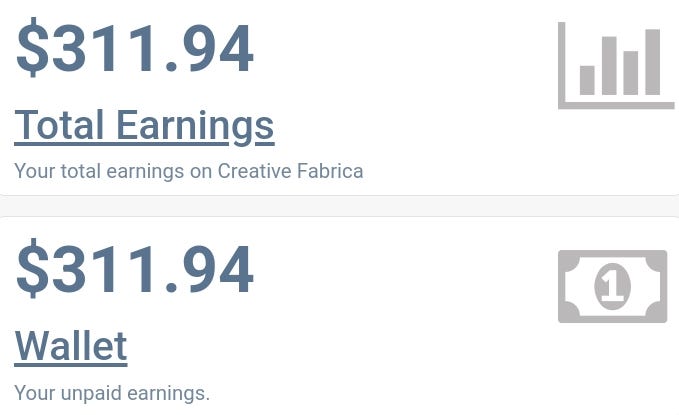
In fact in my creative Fabrica shop, I sell AI generated patterns as bundles alongside my Canva templates.
And so far I’ve made $311.94 on Creative Fabrica Passively. That’s really crazy!
Conclusion
AI is getting better and better everyday.
Before now, it would have taken a super skilled designer to make a pattern like what we generated.
Now, with just a simple prompt, AI does it all.
But wait!
I got way too excited about this new found side hustle, that I almost forgot to mention something important.
To download your AI Images in high quality from Creative Fabrica, you’ll need a subscription.
Well, I couldn’t also justify spending $19 on the subscription for this side hustle.
So, I found a Black Friday deal.
For that $1,
- I got unlimited access to Creative Fabrica, including their AI Pattern generator, for 30 days.
- I also got unlimited access to other creative elements from a library of over 7 million fonts, graphics, and more.

You can also Sign Up for your $1 All access pass on Creative Fabrica here.
Note: There are affiliate links in the article and if you buy something, I’ll get a commission at no extra cost to you.
This content is free, and by using these links, You’ll be supporting my work & that means a whole lot to me.